How to Ganache a Cake with Sharp Edges
So you see all those beautiful cakes with sharp edges that you drool over. You wonder, how do they get such sharp edges? Today I am going to show you how to achieve sharp edges on your cake with chocolate ganache. We are going to ganache a cake from start to finish, no cake flipping necessary.
Can we get the same sharp edges with buttercream? Yes, you can see my post here. While I am a buttercream girl, I love using ganache. Not only is it delicious, but it sets up faster and is super easy to make. Which as you know beats making any Meringue based buttercream any day in regards to time. Ganaching a cake is a good alternative to buttercream. When it comes down to buttercream versus ganache, it is a matter of preference. I use both, but ultimately it depends on the type of cake or what the customer has requested. 
This page may contain affiliate links which mean that if you make a purchase from any links directed from this website I may earn a small commission. I only recommend things that I use and love and classes I have taken. Thank you very much for your ongoing support.
How to Ganache a Cake with Sharp Edges
There are many different methods. One technique that is most popular is the upside method. However, I am not a big fan of flipping cakes. There are so many things that come to mind which includes my fear that it will fall out of my hands. Even though I have used the upside down successfully, I am more comfortable with the “G” method (no I did not create it, I just like to name things after myself) which is leveling the cake from the top. We will get into that later. Getting sharp edges on a cake is very easy, I promise.
Materials needed:
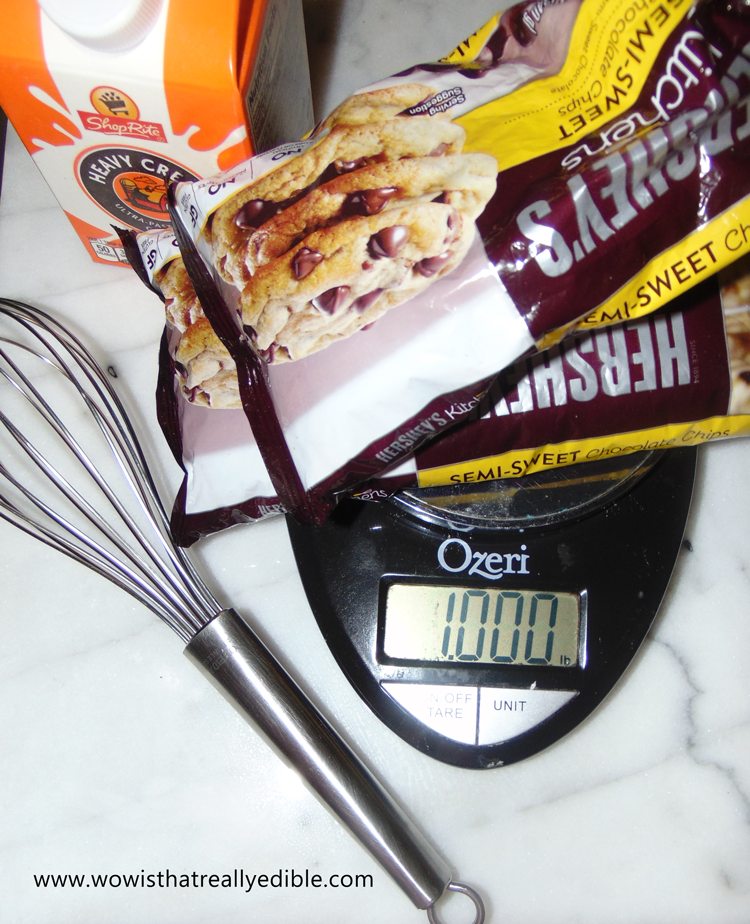
- Chocolate ganache (recipe 2 parts dark chocolate 1 cup heavy cream see my ganache 101 post here for other ratios)
- 2 6-inch Cakes (any size cake will work)
- 2 cake boards the same size as the cake (I used 2 6-inch cake boards)
- Wax paper the size of the board (optional)
- Offset spatula (small and large)
- Small nonstick mat or shelf liner
- Bench scraper
- Level
- Turntable (I have been using Ateco and love it)
Level, Torte and fill Cake
In order to build a perfect cake, you need a great foundation. With that said if you are not great at leveling cakes that’s ok. See my post about getting a flat cake right out of the oven. When all else fails you make use ganache to level each layer.
Split each cake layer into two using a serrated knife or cake leveler. Add a toothpick to each layer to make sure they line up. 
Add a small amount of ganache to the board using a small offset spatula.

Then add the first layer of cake. Make sure the cake is centered on the board. 
Add ganache to each cake and spread with your offset spatula. Then add your next layer. Check to make sure you are leveled for each layer. It should look something like this. 
The next step is trimming the sides of the cake. The goal is to get about a 1/4 inch all around.
Use your bench scraper to check the sides. If the bench scraper is touching the cake, then you need to trim some more. Trim all around until there is enough space between the bench scraper and the cake.
Adding Ganache to the Top of the Cake
Once the sides of the cakes are trimmed it is time to add the ganache to the top of the cake. Be very liberal with the ganache this will be the last time to level the cake. I usually trim the brown off the top of the cake, but because this cake was for the house I kept the top.
Spread the ganache evenly across the top all the way to the edge. Then add wax paper and smooth. 
Add a few small amounts of ganache to the wax paper. Then add the top board and begin to level. Check to make sure the cake is leveled from all directions. I am using a small level here that I keep on top of the cake. 
Once the cake is leveled it is time to add ganache to the side of the cake. Use your bench scraper to make sure the top board is in line with the bottom board. Check all around then secure the cake board by adding ganache underneath and all around.
Ganaching the side of the cake
Add a lot of ganache to the side of the cake then use the bench scraper to remove the excess from the side. Keep adding to fill any holes or spots you may have missed. Make sure the boards are still in line and scrape until the sides are smooth. Place in the refrigerator for about 3o minutes.

Smoothing the sides
Remove the cake from the refrigerator and using a hot knife loosen the top board all around and remove.

Then remove the wax paper off (only if you used it). Fill in any spots that you missed on the sides and the top. The ganache should set quickly. Place a large spatula in a cup of warm water and smooth the sides and top. 
Fix all the imperfections
Continue fixing all the imperfections. Use a brush with warm water to smooth out the edges.

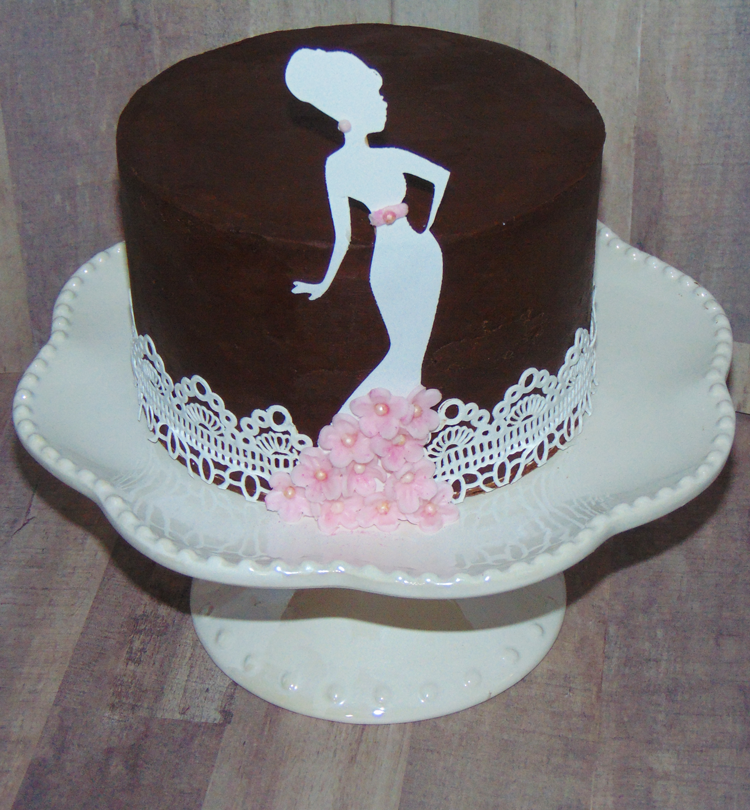
Look at those sharp edges and it was quite simple. Dress up your cake however you like. I added edible lace to the bottom of mine.

Felt like it needed something more, so I added a silhouette with flowers. Also, played around with different backgrounds.
What about you, how do you prefer to ganache a cake?
Love this tutorial? Don’t forget to share the love. As always happy caking, until next time.
Other post you would love:
Three simple ways to get a flat cake everytime
How to frost a buttercream cake with sharp edges

Related Posts
The Ultimate Guide to Chocolate Ganache
This week we are going to talk all about ganache. I like saying the word
April 20, 2018